Have you ever found yourself browsing the internet, or searching Google for research when you find yourself procrastinating on Facebook just a few moments later? You scroll down your news feed, and suddenly come across an advertisement related to what you were browsing just a while back.
Coincidence? Think again.
This was most likely done with the help of a Facebook Tracking Pixel, an immensely powerful marketing tool used by advertisers to target and retarget their content. In this article, we’re going to show you:
- What a Facebook Tracking Pixel is;
- Why you should be installing one;
- An easy-to-follow guide on HOW to install a Facebook Tracking Pixel;

Facebook Today…
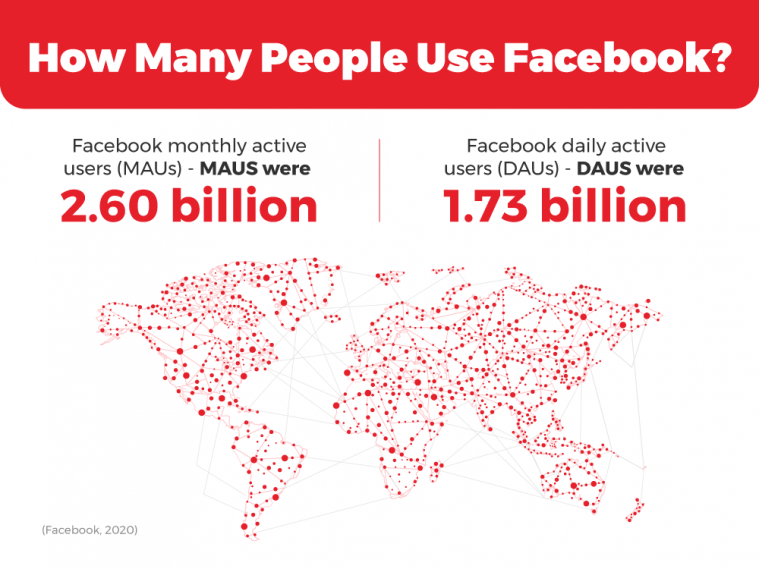
It’s been 16 years since Mark Zuckerberg and his friends began Facebook as a medium for networking. Today, Facebook has over 11 million users from Australia, and nearly 3 billion users from worldwide as the largest social media platform in the world. The growth of the internet with industries going digital has also made Facebook a useful platform for companies. As of 2020, 7 million businesses use Facebook for advertising and 26% of people who click on Facebook ads ended up making a purchase.
Putting up ads on Facebook is only just the start. The real magic begins…with the help of a Facebook Tracking Pixel.
What is a Facebook Tracking Pixel?
An Facebook Tracking Pixel is a short snippet of Javascript code that allows you to track all visitor activity on your website. Every time someone opens up your website and takes an action, the Facebook Tracking Pixel will load a series of functions and give you the information. The pixel does this by placing and triggering website cookies to track users as they interact with your site’s options, as well as your Facebook ads.
With a Tracking Pixel, you’ll be able to see who visits your website and what they look/click at. The pixel will also analyse results to find out who makes a purchase, giving you detailed information on successful conversions.

Why you NEED to install a Facebook Tracking Pixel
If you’re not using an Facebook Tracking Pixel on your website, you might as well stop any paid advertising as well. The pixel provides crucial information about your website. The data you collect that tracks conversions from Facebook ads, can help you optimise them and build targeted audiences for future ads. The data collected would also help you remarket to those individuals who take action on your website.
Lookalike audiences:
For example, if the Tracking Pixel shows that out of 100 people who visited your website, 50 ended up making a purchase. The pixel will identify similarities within those people such as demographics, interests, likes and hobbies. You can then use this information to target your future ads to these ‘lookalike audiences’, expanding your potential customer base.
Customer retargeting:
Similarly, say 25 out of those 100 people added something to their cart but didn’t follow through. The pixel data will allow you to showcase an ad for that exact product, reminding the customer to proceed with the purchase.

Implementing these tactics using a Facebook Tracking Pixel will help you receive a better ROI with your Facebook ad campaigns. Without this tracking data, your ad campaigns would most likely be a case of hit & miss to say the least.
How to install a Facebook Tracking Pixel:
In case you’re wondering whether installing a Facebook Tracking Pixel requires years of coding experience with HTML, CSS and Javascript, it doesn’t. Luckily for us Marketers, installing this pixel is free, and takes less than a minute depending on how your website is set up. We’ve laid out an easy 3-step guide on how to install and set up your pixel.
Step 1: Create your pixel
We’ll assume that you have a Facebook page for your company. Having one will make it easier for you to integrate your pixel, website and Facebook page. If not, you can use your own account for the setup.
Click here to visit the Facebook pixel site. You should have the following page open up:
Next, click on ‘Create a Pixel’.
Step 2: Enter pixel details
Enter a name for your Facebook Tracking Pixel, as well as your website’s URL.
Step 3: Add the pixel to your website
Now you have a few different options moving forward.
Option 1: Developer setup
If you’re the developer of your website, you can manually install the code yourself. Click on ‘Manually install the code yourself’ and you should see the following pop-up window:
Copy and paste the pixel code onto the header code of your website, after the <head> tag, and you’re good to go.
Alternatively, if you’re working with an external developing editor for your website, you can email the Facebook Tracking Pixel instructions and have them install the code for you.
Option 2: Pixel Integration
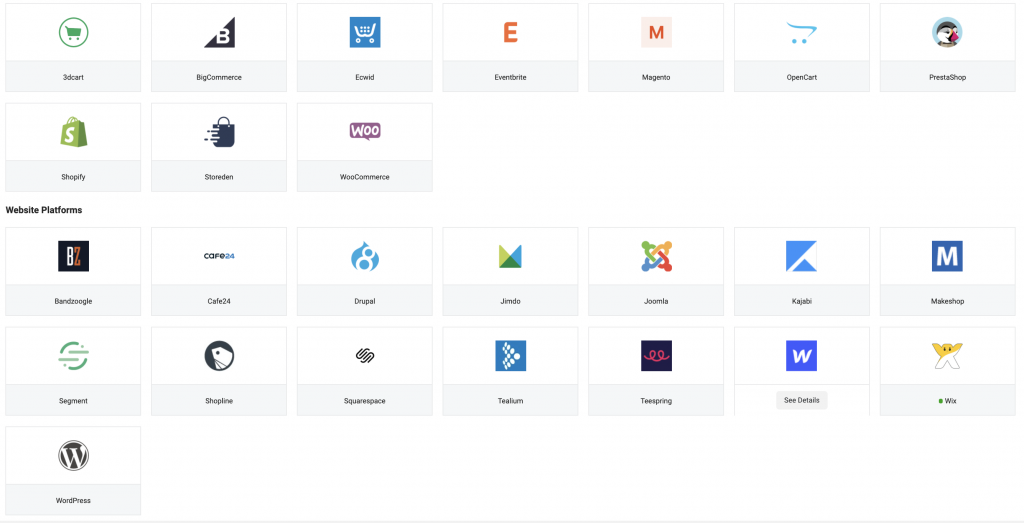
If your website is hosted on an e-commerce site such as Wix, Squarespace, WordPress or Shopify, you can link the platform directly through Facebook. Here is the entire list of partners you can integrate with:

Click the ‘Use an integration or tag manager’ option highlighted in step 3. Select your partner and follow the on-screen instructions.
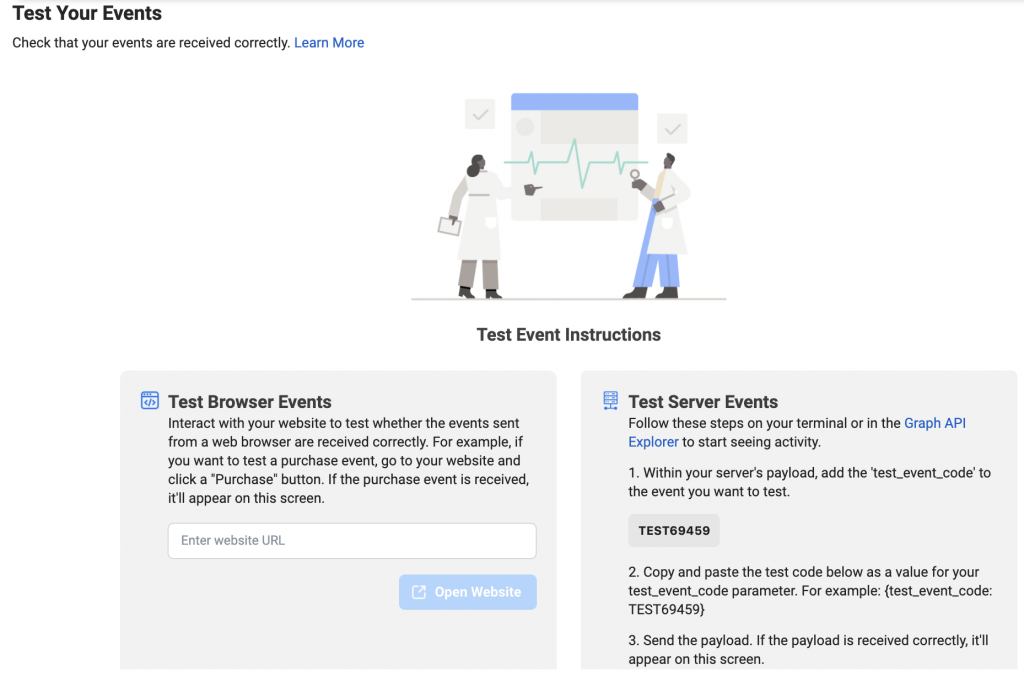
Step 4: Send test traffic
Once your pixel is set up, Facebook would prompt a test traffic request so you can see if it’s up and running. Simply enter your website’s URL and it’ll redirect you to your page. Wait a few seconds and the pixel should display your data in no time!

With your Facebook Tracking Pixel all set up, you’re ready to begin tracking your website visits, creating lookalike audiences and seeing visible improvements with your Marketing efforts. For more information on when you should see results from your Digital Marketing campaign, check out our blog post.
FAQ:
Is a Facebook Tracking Pixel free to use?
Creating and installing a Facebook Tracking Pixel is indeed, free. All you need to get started is functional website for your business, and preferably a Facebook account/page to track metrics. From then on, your pixel will measure website traffic free of charge.
How easy is it to install a Facebook Tracking Pixel?
As easy as it is to create an account on Facebook! Simply head to Facebook’s Pixel site and follow the on-screen instructions to create your pixel. For a step-by-step guide, keep this article open next to you as we’ve outlined each action along the way.
What exactly does a Facebook Tracking Pixel do?
A Facebook Tracking Pixel is a short piece of code linked onto your website. In simple terms, the pixel tracks all the user traffic and activity on your website. It does this by matching the users’ Facebook ID and highlights their demographics for you. With this data, you can identify who visits your site, what they do and how to best target to them.
What are the benefits of installing a Facebook Tracking Pixel?
Having a Facebook Tracking Pixel on your website can benefit your business in the following ways:
1. Measure website traffic by demographics, region and quantity
2. Analyse customer activity on your website (browsing, shortlisting and purchasing)
3. Create lookalike audiences of customers who purchase your product/service
4. Target your ads to the right individuals for higher ROI
Will a Facebook Tracking Pixel help me get more sales?
If you know what to do with the data, then yes it certainly can. The pixel will provide information of all the people who visit your website. If you use that information to specifically target the type of customers who purchase your product, then you could potentially see higher sales and generate better quality leads. It’s a better strategy than to try for a hit & miss advertising campaign where you don’t know whether you’re targeting the right people.
